How to: Install Cedral Click
The UK’s first and only fibre cement tongue and groove external cladding material.


The UK’s first and only fibre cement tongue and groove external cladding material.
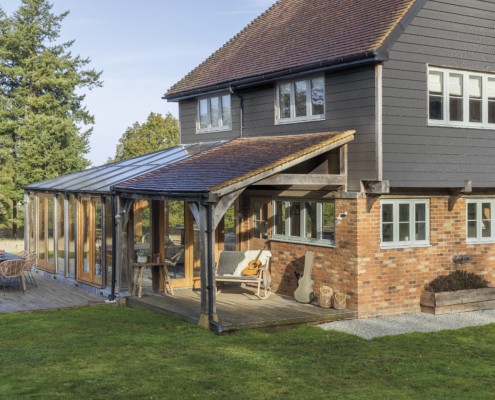
Cedral Click is the UK’s first and only fibre cement tongue and groove external cladding material. Cedral Click has been specified by housebuilders and contractors looking to create inspirational and visually striking developments, and is now growing in popularity amongst self builders.
In addition to its visual appearance, self-builders and homeowners are specifying Cedral Click due to the performance of the material. Fibre cement is extremely low maintenance, there’s no need for continual repainting and it can stand up to the harshest of weather conditions.
Please note that the distance from the edge of the clip to the edge of the plank should not exceed 60mm. For the final plank at the top of the facade, there are two options. If the facade finishes with a whole plank, simply fix with clips. Alternatively, if the facade requires a trimmed plank, fix with coloured mushroom head screws, which must be inserted perpendicular to the panel surface using an electric drill and high quality bit.
For complete fixing instructions, visit Cedral.
Press release and images supplied by Cedral.


 https://ajwdistribution.com/wp-content/uploads/2019/12/ajw-logo-small-300x138.png
0
0
30two
https://ajwdistribution.com/wp-content/uploads/2019/12/ajw-logo-small-300x138.png
30two2015-10-15 10:28:222021-01-13 08:55:19Cedral Board
https://ajwdistribution.com/wp-content/uploads/2019/12/ajw-logo-small-300x138.png
0
0
30two
https://ajwdistribution.com/wp-content/uploads/2019/12/ajw-logo-small-300x138.png
30two2015-10-15 10:28:222021-01-13 08:55:19Cedral Board https://ajwdistribution.com/wp-content/uploads/2015/10/marley-birkdale-slate-tile-main.jpg
308
308
30two
https://ajwdistribution.com/wp-content/uploads/2019/12/ajw-logo-small-300x138.png
30two2015-10-15 10:33:382021-07-05 14:38:29Birkdale Fibre Cement Slate
https://ajwdistribution.com/wp-content/uploads/2015/10/marley-birkdale-slate-tile-main.jpg
308
308
30two
https://ajwdistribution.com/wp-content/uploads/2019/12/ajw-logo-small-300x138.png
30two2015-10-15 10:33:382021-07-05 14:38:29Birkdale Fibre Cement Slate https://ajwdistribution.com/wp-content/uploads/2015/10/marley-rivendale-tile-main.jpg
308
308
30two
https://ajwdistribution.com/wp-content/uploads/2019/12/ajw-logo-small-300x138.png
30two2015-10-15 10:33:382021-07-05 14:40:26Rivendale Fibre Cement Slate
https://ajwdistribution.com/wp-content/uploads/2015/10/marley-rivendale-tile-main.jpg
308
308
30two
https://ajwdistribution.com/wp-content/uploads/2019/12/ajw-logo-small-300x138.png
30two2015-10-15 10:33:382021-07-05 14:40:26Rivendale Fibre Cement Slate https://ajwdistribution.com/wp-content/uploads/2015/10/marley-thrutone-slate-tile-main.jpg
308
308
30two
https://ajwdistribution.com/wp-content/uploads/2019/12/ajw-logo-small-300x138.png
30two2015-10-15 10:33:382021-07-05 14:41:27Thrutone Fibre Cement Slate
https://ajwdistribution.com/wp-content/uploads/2015/10/marley-thrutone-slate-tile-main.jpg
308
308
30two
https://ajwdistribution.com/wp-content/uploads/2019/12/ajw-logo-small-300x138.png
30two2015-10-15 10:33:382021-07-05 14:41:27Thrutone Fibre Cement Slate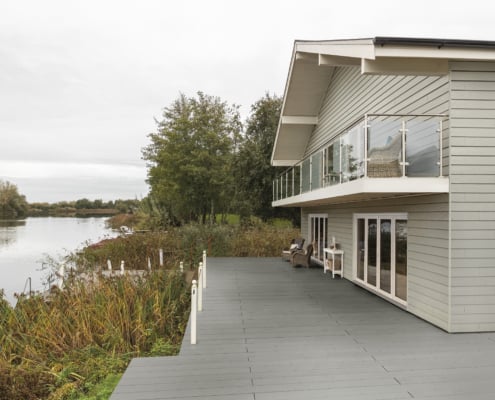 https://ajwdistribution.com/wp-content/uploads/2015/10/C76-Tea-Green-2-scaled.jpg
1707
2560
Ava Milne
https://ajwdistribution.com/wp-content/uploads/2019/12/ajw-logo-small-300x138.png
Ava Milne2023-09-05 09:50:322023-10-10 13:52:37Cedral Click Weatherboard External Cladding
https://ajwdistribution.com/wp-content/uploads/2023/09/C74-Basalt-Grey-2-scaled.jpg
1707
2560
Claudia Miles
https://ajwdistribution.com/wp-content/uploads/2019/12/ajw-logo-small-300x138.png
Claudia Miles2023-09-28 20:57:522023-09-28 21:09:57Cedral Lap Weatherboard External Cladding
https://ajwdistribution.com/wp-content/uploads/2015/10/C76-Tea-Green-2-scaled.jpg
1707
2560
Ava Milne
https://ajwdistribution.com/wp-content/uploads/2019/12/ajw-logo-small-300x138.png
Ava Milne2023-09-05 09:50:322023-10-10 13:52:37Cedral Click Weatherboard External Cladding
https://ajwdistribution.com/wp-content/uploads/2023/09/C74-Basalt-Grey-2-scaled.jpg
1707
2560
Claudia Miles
https://ajwdistribution.com/wp-content/uploads/2019/12/ajw-logo-small-300x138.png
Claudia Miles2023-09-28 20:57:522023-09-28 21:09:57Cedral Lap Weatherboard External Cladding
")
